
Python Tesseract OCR (python tesseract ocr): Quick Guide to OCR
If you’ve ever been buried under a pile of scanned receipts or invoices, you know the soul-crushing routine of manual data entry. This is where Python Tesseract OCR comes in. Tesseract is a fantastic open-source engine for pulling text from images, and the pytesseract library makes it incredibly easy to use right inside a Python script.
Your Starting Point for Python Tesseract OCR
Think about an accounting team drowning in invoices or an insurance adjuster manually typing data from claims forms. The combination of Python and Tesseract gives you a way to automate these exact tasks, turning messy, unstructured documents into clean data you can actually use.
This guide is designed to get you started without the confusing jargon. Whether you're a finance manager who’s tired of copy-pasting or a developer looking to build a new automation tool, you don't need to be a machine learning guru to get real results.
A Skill in High Demand
The push to digitize isn't just a buzzword; it's a massive shift. The global market for Optical Character Recognition systems is expected to balloon to $40.61 billion by 2030. This boom is fueled by AI improvements and a relentless need for automation in practically every industry.
This huge market growth points to a real-world business headache. Companies are desperately looking for ways to solve problems that python tesseract ocr is built for:
- Automating data entry: This frees up your team from tedious, repetitive work.
- Building searchable archives: You can finally turn those digital "paper graveyards" into valuable, searchable assets.
- Boosting data accuracy: It helps cut down on the human errors that inevitably creep in during manual transcription.
Pairing the Right Tools for the Job
When it comes to OCR projects, Python's strengths in AI and ML make it the perfect language for the job. Its massive collection of libraries—like OpenCV for image processing—work beautifully alongside Tesseract.
The real power here is the flexibility. You can start with a simple script to grab text from one image and gradually build a sophisticated workflow that processes thousands of documents a day.
In this guide, we'll walk through how to build that solid foundation. If you're completely new to this world, our broader overview of optical character recognition is a great place to get your bearings. Our goal is to give you the skills to solve practical problems, starting today.
Alright, before we can pull any text from an image, we have to get our tools set up and talking to each other. Every python tesseract ocr project has two essential parts: the Tesseract engine itself, and the pytesseract library that lets Python control it.
Getting these two working together is the first—and most common—hurdle. Let's walk through it.
First things first, you need to install the Tesseract OCR engine on your machine. This isn't a Python package; it's a separate program, and the installation depends on your operating system.
- On Windows: Your best bet is to grab an official installer from the Tesseract GitHub repository. During the installation wizard, you'll see an option to add Tesseract to your system's PATH. Do it. Checking that box will save you a ton of frustration later.
- On macOS: If you use Homebrew, this is a breeze. Just pop open your terminal and run
brew install tesseract. - On Linux: For Debian or Ubuntu users, a simple
sudo apt install tesseract-ocrwill get the job done.
Installing Pytesseract and Making Sure It Works
With the Tesseract engine ready, the Python part is simple. You just need to install the pytesseract wrapper, ideally inside a dedicated virtual environment for your project.
pip install pytesseract
Now for the moment of truth. Your Python script needs to know where to find the Tesseract program you installed. If you didn't add it to your system PATH during installation, pytesseract will have no idea where to look, and your code will fail.
Trust me on this: If you ever see a
TesseractNotFoundError, it’s almost always a PATH issue. The fix is to tellpytesseractthe exact location of the Tesseract executable right at the start of your script.
Here’s a quick script to test your setup. If you're on Windows and didn't set the PATH, you'll need to uncomment and edit that first line.
import pytesseract from PIL import Image
For Windows users, the path might look something like this:
pytesseract.pytesseract.tesseract_cmd = r'C:\Program Files\Tesseract-OCR\tesseract.exe'
try: # This simple command asks for the version, which confirms # that pytesseract can successfully call the Tesseract engine. version = pytesseract.get_tesseract_version() print(f"Success! Found Tesseract version: {version}") except Exception as e: print(f"Error: Could not find or run Tesseract. Double-check your installation and PATH.") print(e)
Running this script and seeing a version number means you're good to go.
Working with Other Languages
One of Tesseract's biggest strengths is its ability to recognize over 100 languages. But it doesn't come with all of them out of the box. If you're processing documents in German, for instance, you'll need to install the specific language pack.
On macOS, you can get them all with brew install tesseract-lang. On Ubuntu, you'd install a specific language like German with sudo apt install tesseract-ocr-deu.
With this foundation in place, you’ve cleared the biggest technical hurdle. Now you're ready for the fun part: cleaning up your images and actually extracting some text.
Preprocessing Images for Maximum OCR Accuracy
If there's one thing I've learned from years of working with Tesseract, it's this: the OCR part is easy. The real work—the part that separates a successful project from a frustrating failure—is all in the image preparation. The old "garbage in, garbage out" mantra has never been more true. If you feed Tesseract a blurry, tilted, or noisy image, you're going to get a mess of garbled text back.
To get clean results, you need to start with a clean image. This is where a bit of preprocessing magic using a library like OpenCV comes in. By applying a few key transformations, you can make the text pop and give Tesseract a fighting chance.
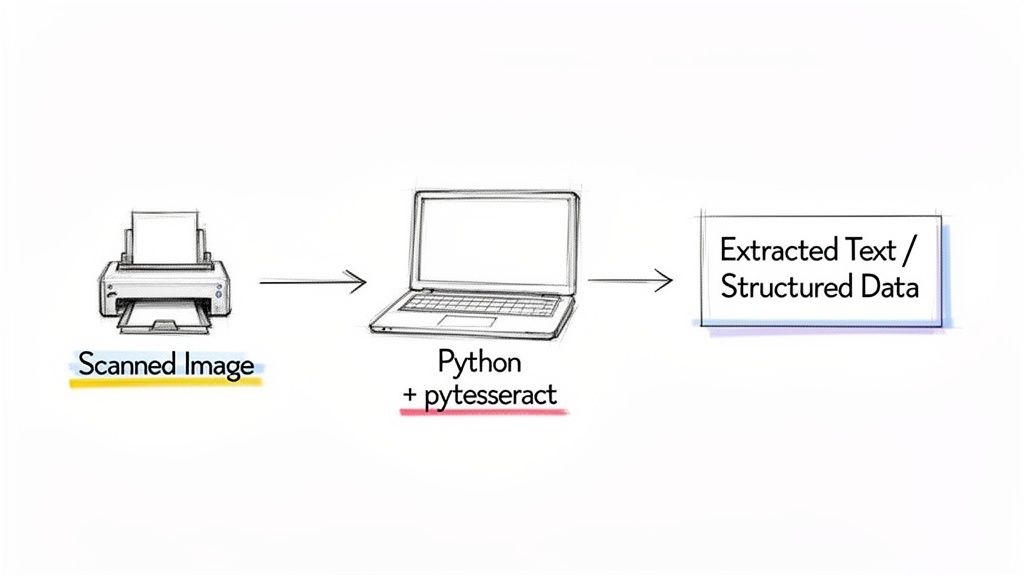
This flowchart gives a quick overview of the initial setup you'll need on your machine before you can even start thinking about preprocessing.

No matter if you're on Windows, macOS, or Linux, getting the core Tesseract engine installed is the non-negotiable first step.
Starting with Grayscale
Your first move should almost always be to convert the image to grayscale. Color might look nice, but for an OCR engine, it's mostly just noise. Tesseract cares about one thing: the contrast between the text and its background.
Going grayscale strips out all the color data, leaving you with a simpler image based on shades of gray. Think of it as clearing the clutter off your desk before starting a big project. It removes distractions and perfectly sets the stage for the next, most crucial step.
Making Text Pop with Thresholding
With your grayscale image ready, it's time for thresholding. This technique is a game-changer. It converts every pixel to either pure black or pure white based on a set "threshold" value. Anything darker than the threshold becomes black, and anything lighter becomes white.
The result is a super high-contrast image where the text is razor-sharp against a stark white background.
For documents with shadows or uneven lighting (a common problem with phone camera "scans"), adaptive thresholding is your best friend. Instead of using a single brightness threshold for the entire image, it calculates a unique threshold for different small regions. This is fantastic for fixing gradients and shadows in receipts or invoices.
I once had a project pulling data from stacks of old, faded receipts. On the first pass, Tesseract gave me gibberish. After applying adaptive thresholding, the accuracy shot up to over 90%. It's often the single most powerful tweak you can make.
Straightening Things Out with Deskewing
Ever scanned a page and had it come out slightly crooked? Even a tiny tilt can confuse Tesseract, which expects text to be perfectly horizontal. A few degrees of skew can cause it to misread entire lines or jumble words together.
Deskewing is the fix. It's an automated process that detects the text's angle and rotates the image to make it perfectly level. With OpenCV, you can find the primary angle of the text blocks and use that to correct the orientation. It's a simple step that ensures Tesseract reads lines of text the way they were meant to be read.
A few other preprocessing tricks are worth keeping in your back pocket:
- Noise Removal: Got grainy images or "salt-and-pepper" noise from a bad scan? A light blur, like a Gaussian blur, can smooth out those imperfections before you apply thresholding.
- Resizing: Tesseract works best with images that are around 300 DPI. If your image resolution is too low, the characters might be too pixelated to recognize. Scaling the image up can make a huge difference.
By putting together a simple preprocessing pipeline—grayscale, deskew, threshold, and maybe some noise removal—you stop guessing and start controlling your results. You’re giving your python tesseract ocr workflow the best possible input, which is the only way to get reliable output.
Extracting Text and Tuning Tesseract Performance
Once your image is clean and prepped, it's time to actually pull the text out. The workhorse function in any python tesseract ocr project is image_to_string(). In its simplest form, it takes your processed image and hands you back a string of text.
import pytesseract from PIL import Image
Assuming 'processed_image' is your prepped image from the previous steps
extracted_text = pytesseract.image_to_string(processed_image)
print(extracted_text)
For a really clean document, this one line can work surprisingly well. But to get reliable, production-ready results, you need to give Tesseract a few more hints about what it's looking at.
Guiding Tesseract with Page Segmentation Modes (PSM)
Tesseract is smart, but it can't magically know the layout of your document. Is it a single word? A full page with columns? You have to tell it how to segment the page using Page Segmentation Modes (PSM). This is easily one of the most impactful tuning options you have.
You set the PSM by passing a configuration string. For instance, if you've cropped an image down to a single line of text, like an invoice header, you can tell Tesseract to treat it that way using PSM 7.
Tell Tesseract to expect a single line of text
config_options = '--psm 7' single_line_text = pytesseract.image_to_string(image_crop, config=config_options)
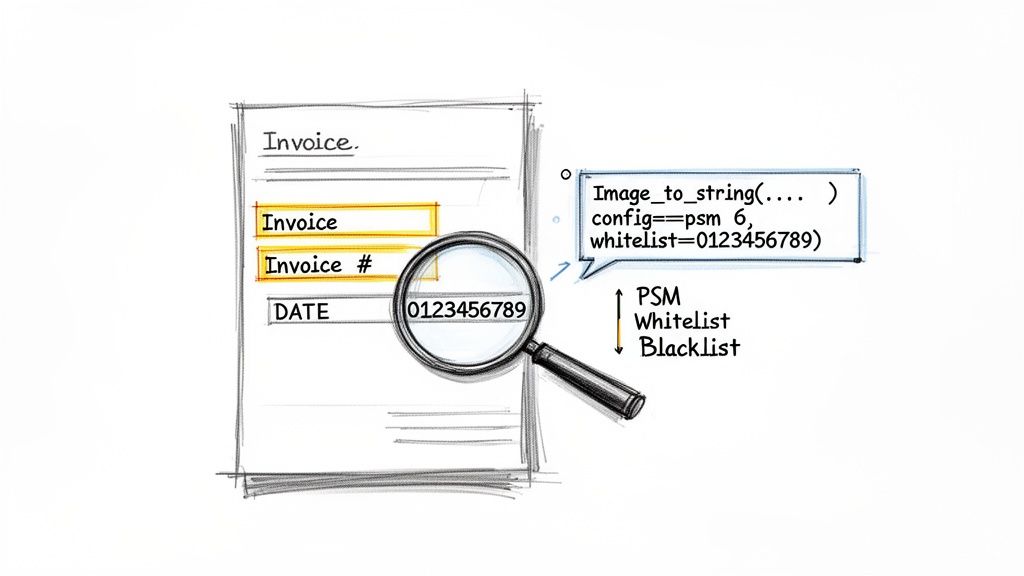
Choosing the right PSM makes a huge difference. While the default (--psm 3) is good for a full page, I've found --psm 6, which assumes a single uniform block of text, is a fantastic choice for extracting isolated fields.
Pro Tip: I almost always start with
--psm 6for specific fields like invoice numbers or dates. It forces Tesseract to see the area as one coherent block, which dramatically cuts down on errors from it trying to guess the layout.
Fine-Tuning with Whitelists and Blacklists
Let's say you're trying to pull an invoice number that should only contain digits and dashes. OCR engines notoriously confuse characters like 0 and O or 1 and l. You can eliminate these errors entirely by giving Tesseract a whitelist—a specific list of characters it's allowed to recognize.
Here's how you'd lock it down to only numbers and the dash symbol:
- Whitelist:
tessedit_char_whitelist=0123456789-
On the flip side, if you keep getting garbage characters in your output, you can use a blacklist to explicitly forbid them.
- Blacklist:
tessedit_char_blacklist=@#$%^&*
You just add these to the same configuration string. Putting it all together, let's grab that invoice number with high confidence:
Configure Tesseract for a single block of text containing only numbers and dashes
invoice_num_config = '--psm 6 -c tessedit_char_whitelist=0123456789-' invoice_number = pytesseract.image_to_string(invoice_number_crop, config=invoice_num_config)
This level of control is what separates a quick script from a reliable data extraction tool. When you combine good preprocessing with these tuning techniques, Python Tesseract OCR can deliver over 95% accuracy on high-quality scans of printed text. And with support for over 100 languages, it’s an incredibly versatile option.
If you're dealing with more than just single images, these same principles apply. For a deeper look into handling entire documents, check out this guide on how to extract text from PDF files using Python. Mastering these tuning methods is truly the key to unlocking Tesseract’s power.
When a DIY Python OCR Approach Is Not Enough
While building a custom python tesseract ocr solution is incredibly powerful, it's not always the right move. I've seen many projects hit a wall. There’s a clear point of diminishing returns, especially once your business needs to scale or start tackling the messy, unpredictable documents you find in the real world.
The second you graduate from simple text extraction, the complexity goes through the roof. You’re no longer just a developer writing a Python script; you suddenly become a systems architect tasked with building and maintaining a full-blown production pipeline.
Where Tesseract Hits Its Limits
Let’s think about a couple of common business scenarios where a simple Tesseract script starts to fall apart. Imagine an accounting department getting invoices from hundreds of different vendors, each with its own unique layout. Or a procurement team trying to compare line-item prices from several different proposals, all formatted as complex tables.
In these situations, Tesseract on its own is going to struggle. At its core, it’s a text recognition engine, not a document understanding engine. It can read the words on the page, but it has no idea what they actually mean in context.
- Varying Layouts: Tesseract can't reliably find the "Total Amount" if it jumps around from one invoice to the next.
- Complex Tables: Trying to pull structured data from tables with merged cells, weird headers, or no borders is a classic, error-prone nightmare.
- Significant Engineering: The time and money you'll pour into building, testing, and maintaining parsing logic for every new document layout adds up fast.
The real challenge isn't just extracting text; it's extracting structured, meaningful data. This is the critical gap between a DIY script and a true document processing solution.
The No-Code Alternative for Business Workflows
This is exactly where dedicated platforms like DocParseMagic come into play. These tools are built specifically to solve that "last mile" problem of OCR: turning a raw wall of text into structured, usable information without needing to write any code. Instead of just dumping text, they intelligently identify and pull out specific fields you care about.
Here's an easy way to think about it: python tesseract ocr gives you a pile of raw lumber. A no-code platform gives you a finished, pre-assembled piece of furniture. It goes beyond basic text extraction to deliver clean, organized data for specific business needs like accounts payable or client onboarding. This focus can slash manual data entry costs by up to 70%. You can see how Tesseract is used in business automation in this great overview from Klippa.
For any team that needs to process a diverse set of documents at scale, choosing the right tool is everything. If you want to see what else is out there, you might find our guide on the best free OCR software helpful. The goal is always to pick a solution that matches your team's skills, the complexity of your documents, and your long-term automation goals.
Common Tesseract and Python Questions
Once you have Tesseract installed and your first script running, you'll quickly realize the real work has just begun. Getting from a basic "hello world" to reliably pulling data from real-world documents is where the challenge lies. Let's walk through some of the most common hurdles you're likely to encounter and how to clear them.
These are the questions that always come up when you start building something serious, and the answers are based on plenty of trial and error.
How Can I Get Better Results from Blurry or Messy Images?
If you're getting garbage output, your first suspect should always be the input image. You simply can't get clean text from a messy scan. Good preprocessing is non-negotiable, and it almost always involves a few key steps.
First, convert the image to grayscale. This simplifies the visual information and is a standard first move for almost any OCR task.
Next, you'll want to apply adaptive thresholding. This is a game-changer for images with shadows or uneven lighting, as it turns the image into a crisp black-and-white version where the text really pops. If your document is slightly tilted—a common issue with scanners—use a deskewing algorithm to straighten it out. The cleaner the image you give Tesseract, the better your chances of success.
Think of it like this: If you mumble your words to a translator, you're going to get a confusing translation. You need to speak clearly. Image preprocessing is how you get your document to "speak clearly" to Tesseract.
Can Python Tesseract Actually Read Handwriting?
This is probably the most-asked question, so let's get it out of the way: No, not really.
Tesseract was built from the ground up for machine-printed text (think fonts on a computer). While its latest LSTM engine (OEM 1) might manage to decipher some extremely neat, separated block letters, it's completely unreliable for anything else.
If your project depends on reading cursive script, messy field notes, or any typical handwriting, you'll hit a wall with Tesseract very fast. For those jobs, you’re far better off exploring commercial OCR services or custom machine learning models specifically trained for handwriting.
Why Is Tesseract Giving Me Gibberish or Nothing at All?
Seeing an empty string or a jumble of random characters is a classic sign that something's wrong. It usually boils down to one of a few culprits:
- Bad Preprocessing: This is the #1 cause. If the text is too faint, noisy, or blurred, Tesseract can't make sense of it. Go back and fine-tune your grayscale, thresholding, and deskewing.
- Incorrect Tesseract Path:
pytesseractneeds to know where the Tesseract engine is installed. If it can't find the executable, it often fails silently. Double-check that Tesseract is in your system's PATH or that you’ve explicitly set thetesseract_cmdpath in your script. - The Wrong Page Segmentation Mode (PSM): A mismatched PSM tells Tesseract to analyze the page layout incorrectly. For instance, using the default full-page analysis on a single cropped word will likely fail. Try experimenting with other modes, like
--psm 6(assume a single uniform block of text) or--psm 7(treat the image as a single text line).
How Do I Pull Text from Just One Part of the Page?
Most of the time, you don't need the entire document; you just need an invoice number, a date, or a total amount. Processing the whole image for a tiny piece of data is slow and introduces more chances for errors.
The right approach is to "zone in." Use a library like Pillow or OpenCV to crop the image down to the specific coordinates of your region of interest (ROI).
Once you have that smaller, cropped image, you can feed just that piece to pytesseract.image_to_string(). This method is not only faster but also dramatically more accurate, as you can apply very specific configurations—like a numbers-only whitelist—to that one field.
If you find yourself spending more time wrestling with image preprocessing and complex document layouts than you’d like, you might want to look at a no-code tool. DocParseMagic, for instance, is built for exactly this. You can upload your documents and get structured, clean data in minutes without writing a single line of code. Give it a try for free and see how it handles your toughest documents.