Convert Image to Text in Word Your Complete 2026 Guide
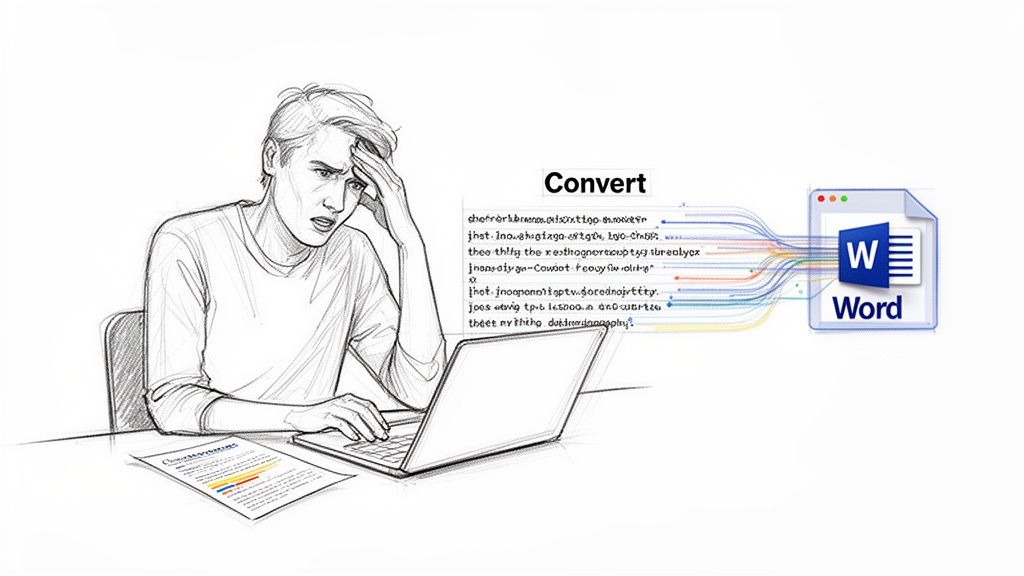
We’ve all been there: staring at a picture of a document, a scanned report, or a whiteboard full of notes, knowing we have to retype every single word. It’s a frustrating and tedious task.
But what if I told you the fastest way to convert an image to text in Word is a simple workaround that’s already built into the software? All you have to do is save your image as a PDF, then open that PDF file directly in Word. This one small step triggers Word's built-in text recognition, turning a static picture into an editable document in seconds.
Stop Retyping and Start Converting Text
That sinking feeling you get when you realize you have to manually transcribe text from an image is universal. It’s not just a time-waster; it’s a recipe for typos and formatting headaches. The good news is that modern tools can do the heavy lifting for you.
The technology that makes this possible is called Optical Character Recognition (OCR).
The Power of Optical Character Recognition
Essentially, OCR software analyzes an image, identifies the letters, numbers, and symbols within it, and converts them into actual, editable text. It’s the engine running behind the scenes of every method we'll cover. If you’re curious about the mechanics, you can dive deeper into what is Optical Character Recognition and how it works.
The demand for this technology is surging. The global OCR market, valued at $10.62 billion in 2022, is projected to hit an incredible $32.90 billion by 2030. This isn't just a tech trend; it reflects a fundamental shift in how businesses are handling documents and data, as detailed in market analysis from Grand View Research.
OCR turns hours of manual data entry into minutes of minor editing. It’s the bridge between your physical documents and your digital workspace.
Real-World Uses for Image-to-Text Conversion
This isn't just a novelty feature—it's a lifesaver in so many common situations. I’ve seen it used for everything from huge corporate projects to simple personal tasks.
Here are a few classic examples:
- Digitizing Invoices: An accountant gets a scanned invoice from a vendor. Instead of typing out every line item, they use OCR to extract the data and copy it straight into their accounting software.
- Capturing Meeting Notes: A project manager snaps a picture of a whiteboard covered in brainstorming notes. They convert that image to text to create an editable summary they can share with the team instantly.
- Saving Research: A student finds a key chapter in a reference-only library book. A quick photo with their phone and an OCR conversion saves them from hours of manual transcription.
These tricks are fantastic for one-off documents. But if your desk is constantly buried under stacks of paperwork, you'll eventually want to look into a more powerful, automated solution built for high-volume business workflows.
Using Word's Built-In PDF Conversion for OCR
Believe it or not, a surprisingly powerful way to pull text from an image is already built right into Microsoft Word. It’s a clever workaround I’ve used countless times for quick jobs without needing any extra software. The method uses Word’s PDF conversion feature to perform OCR, and it’s hidden in plain sight.
The whole trick relies on a simple two-step process: you first save your image as a PDF, and then you use Word to open that PDF. It's in that second step that Word works its magic, automatically detecting and converting the text for you.
Preparing Your Image and Document
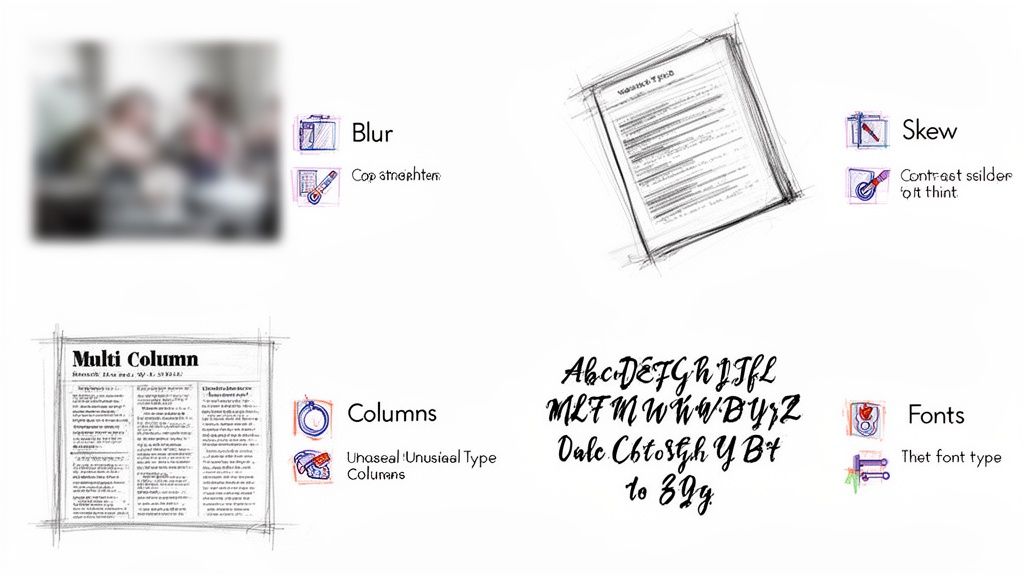
Before you even open Word, take a look at your source image. The old saying "garbage in, garbage out" is especially true for OCR. A blurry, low-resolution photo taken in bad lighting will give you a jumbled mess of characters. For the best results, you want a clear, high-resolution image with even lighting. A scan at 300 DPI is the gold standard here.
Once you have a good quality image, the process is straightforward:
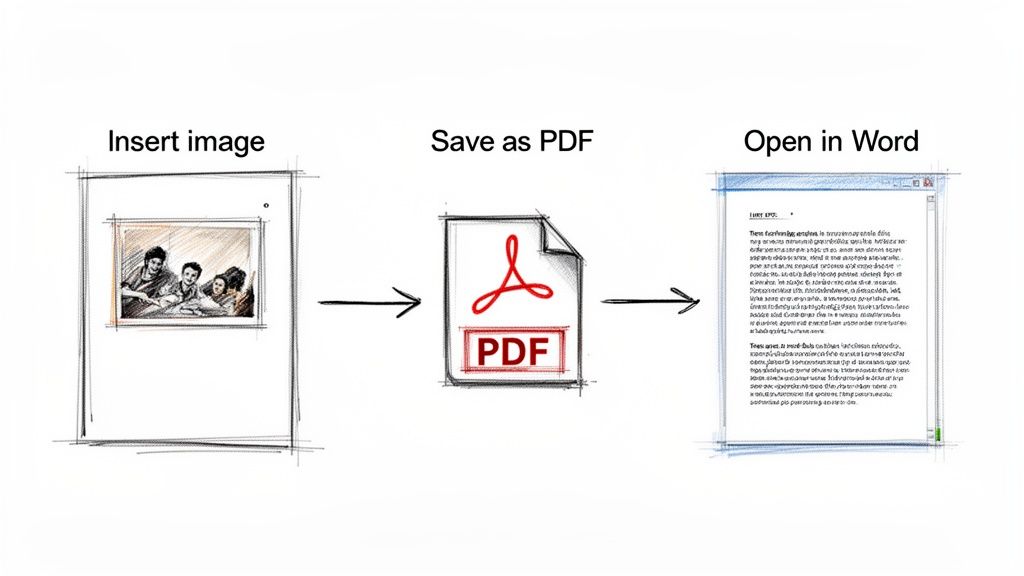
- First, open a blank Word document. Pop your image in by going to the Insert tab, clicking Pictures, and choosing your file.
- Next, head to File > Save As. In the "Save as type" dropdown menu, select PDF and save the document somewhere you can easily find it.
- Now, close that document and go to File > Open. Find the PDF you just created and open it. You’ll see a pop-up from Word, letting you know it's about to convert the PDF into an editable Word document. Just click OK.
That final step is where the text extraction happens. Word analyzes the image inside the PDF, identifies the text, and creates a brand-new, editable document with the results.
Cleaning Up the Converted Text
No OCR tool is 100% perfect, so you should always plan on doing a little bit of cleanup. How much work you’ll have depends entirely on the clarity of your original image and the complexity of its layout. Watch out for common mistakes, like the number '1' being mistaken for a lowercase 'l', or '0' getting swapped with an uppercase 'O'.
Pro Tip: I always keep the original image open on one side of my screen and the new Word document on the other for a quick side-by-side proofread. Use Word’s "Find and Replace" tool (Ctrl+H) to fix recurring mistakes in one go.
After you’ve fixed any character errors, you'll probably need to tackle the formatting. The OCR is focused on recognizing text, not perfectly replicating the original layout. Columns, tables, and unique fonts often get lost in translation.
A good starting point is to select all the text and use the "Clear All Formatting" button. This gives you a clean slate, making it much easier to reapply headings, lists, and proper paragraph spacing. If you find yourself working with PDFs often, you might find our other guide on how to convert PDF to text helpful for exploring different methods.
Using OneNote and Office Lens for On-the-Go Scanning
Let’s be honest, not every document you need to work with is sitting on your computer. More often, you’re trying to capture information in the wild—a whiteboard from a brainstorming session, a key slide from a presentation, or even a business card. This is where Microsoft Office Lens and OneNote team up to make your life a whole lot easier.
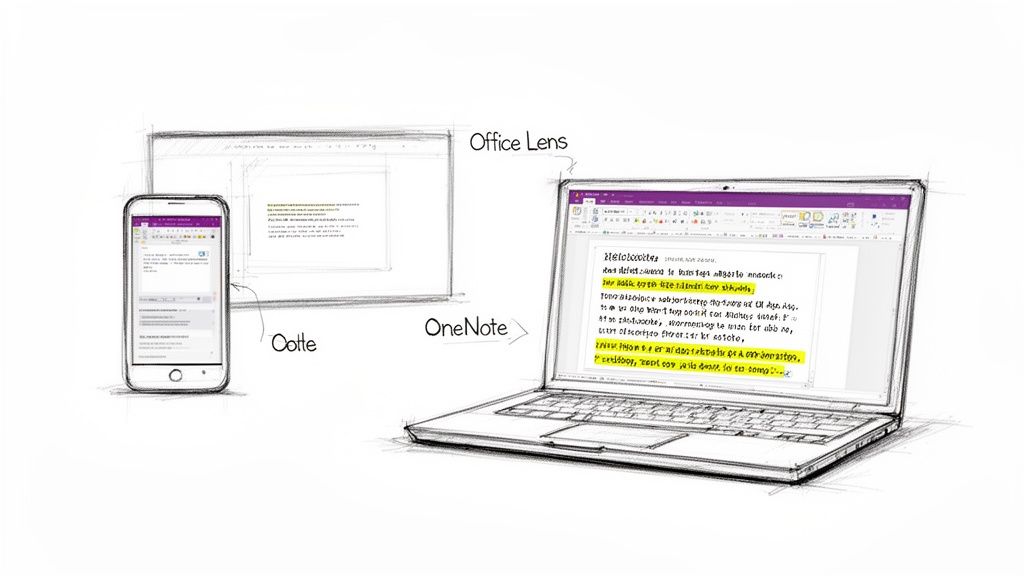
Think about being in a meeting and scrambling to copy down notes from a whiteboard. Instead of typing everything out, just pull out your phone and snap a picture with Office Lens. The app is fantastic at what it does; it automatically detects the edges, straightens the image, and gets rid of shadows to give you a clean, readable scan.
The Mobile-to-Desktop Workflow
After you’ve captured your image, Office Lens gives you the option to send it straight to OneNote. Once it lands in your notebook, OneNote's built-in OCR (Optical Character Recognition) quietly starts working in the background. In just a few minutes, all the text from your picture becomes searchable and, most importantly, ready to copy.
This method is a game-changer for anyone who works away from their desk.
- Consultants can instantly digitize brainstorming notes and turn them into formal meeting summaries.
- Sales reps can snap a photo of a business card or client form and skip the tedious manual data entry later.
- Students can grab photos of textbook pages or lecture slides to create searchable study guides.
The real magic happens when you get back to your computer. Just open OneNote, find the page with your image, right-click on the picture, and choose "Copy Text from Picture."
The text is now copied to your clipboard, ready for you to paste into a new Word document. It’s a simple yet powerful way to convert image to text in word using tools you probably already have installed.
The demand for this kind of cloud-based text recognition is exploding. The online OCR market, which hit $2 billion in 2025, is on track to approach $6 billion by 2033. A huge driver for this growth is the need to reduce manual entry mistakes, which can impact up to 30% of business documents and cause major operational headaches. You can dig into more of the numbers in this report from Data Insights Market. A quick mobile workflow like this helps you get accurate text right from the start.
Common Problems and Pro Tips for Accurate Conversions
Ever tried converting an image to text, only to end up with a garbled mess of characters and wacky formatting? It’s a familiar headache. Before you blame the software, take a close look at your starting image—that’s almost always where the problem lies.
Blurry snapshots, poor lighting, or a crooked angle can completely throw off an OCR engine. Your goal is to give it the cleanest, most legible text possible before you even start.
Tackling Complex Layouts and Poor Quality
I’ve seen this countless times: you scan a newsletter or a research paper with multiple columns, and the OCR engine tries to read straight across the page. The result? A single, nonsensical paragraph that merges everything together.
The easiest way around this is to crop the image into separate, single-column sections. Process each column on its own and then simply copy and paste the text back together in Word. This one little prep step will dramatically improve your accuracy.
Fonts and contrast can also trip up the software. Highly stylized or handwritten fonts are tough for any OCR to decipher, and low contrast between the text and its background makes the characters hard to distinguish.
Think of OCR as a first draft, not a flawless final copy. The goal is to get a workable block of text that you can then clean up and format. Setting realistic expectations saves a lot of frustration.
Relying on old-school manual document review is surprisingly error-prone. In fact, traditional processing methods can produce 20-25% inaccuracies and take hours to complete for a single batch of documents. This is a well-known issue for teams trying to compare something like vendor proposals from scanned files, as highlighted in recent research on OCR systems.
Here are a few quick tips I always follow to get the best results:
- Boost the Contrast: Use a basic photo editor to slightly increase the contrast and sharpen the image. It makes the text pop.
- Use a Flat Surface: Always place your document on a flat table in a well-lit room. This prevents shadows and skewed text.
- Check Resolution: For the cleanest text recognition, make sure your image is a high-resolution file, ideally around 300 DPI.
When to Move Beyond Manual Conversions
The tricks we've covered are fantastic for a one-off job. When you just need to pull text from a single image or a scanned contract page, the built-in Word or OneNote features are lifesavers. They're quick, easy, and already on your computer.
But what happens when "a single image" turns into a daily flood of them? If you’re staring at stacks of vendor invoices, new patient forms, or purchase orders every week, that manual conversion process goes from a handy trick to a serious time-sink. That’s the point where you need to think beyond these personal productivity hacks and look at professional automation.
From Basic OCR to Intelligent Document Processing
There's a huge difference between simply recognizing characters on a page and actually understanding the document's content. That's the leap from basic OCR to what we call intelligent document processing.
Let's use a real-world example: an invoice. A simple tool to convert image to text in word will just dump out all the text. You're still left with the tedious job of finding and copy-pasting the invoice number, the due date, and the total amount.
An intelligent platform, on the other hand, does the heavy lifting for you. It can:
- Pinpoint specific data like "Invoice Number," "Due Date," and "Total Amount."
- Extract that information in a structured way.
- Automatically send that data directly to your accounting software or a spreadsheet, with no manual entry needed.
For anyone in accounting, logistics, legal, or procurement, this is a massive win. It’s not just about saving time; it's about eliminating the costly typos and human errors that inevitably happen when you're manually entering data all day.
When the cost of manual errors and wasted hours starts to outweigh the convenience of free tools, it's time to invest in a dedicated document automation solution.
For any business processing dozens or even hundreds of documents each month, these systems become essential for running an efficient operation. If your volume is still low and you're just looking for a solid OCR tool for individual tasks, you might find our guide on the best free OCR software helpful.
Frequently Asked Questions About Image to Text Conversion
When you start pulling text from images, you're bound to run into a few common hiccups and questions. It's just part of the process. So, let's walk through some of the things I get asked all the time about getting text from an image into Word.
Can I Convert Handwritten Notes to Text in Word?
This is the big one, but the answer is usually "not very well." Even though some tools are getting smarter, most OCR software—including the features in Word and OneNote—really struggles with handwriting.
You might have some luck if you write in very neat, separate block letters. But for everyday cursive or quick, messy notes? The accuracy just isn't there. You'll spend more time fixing mistakes than you would have spent just retyping it. If you absolutely need to digitize handwriting, your best bet is to find a dedicated app built specifically for that task. For everyone else, stick to printed text for reliable results.
Why Is the Formatting Wrong After Conversion?
It’s a classic problem. You convert a perfectly laid-out document, and it comes into Word as a jumbled mess. Think of OCR as a speed-reader, not a graphic designer. Its one and only job is to recognize characters, not to perfectly preserve the original layout.
It does a decent job with simple paragraphs, but complex formatting almost never survives the trip.
- Columns and Tables: These usually get squished into one continuous block of text.
- Fonts and Styles: Don't expect your specific fonts, colors, or bolding to carry over.
- Headers and Footers: This info often gets dumped right into the main body of the text.
Pro-Tip: My first move after any conversion is to select all the new text (Ctrl + A) and hit the "Clear All Formatting" button in Word. This strips away any weird, hidden formatting from the OCR process and gives me a clean slate to work with. It saves a ton of headaches.
How Does Image Quality Affect OCR Accuracy?
Image quality isn't just a small factor; it's everything. I can't stress this enough. A blurry, low-resolution, or poorly lit image is the number one reason for a failed conversion. Garbage in, garbage out.
To give the software the best possible chance, make sure your image is:
- High-Resolution: You want at least 300 DPI (dots per inch).
- Crisp and Clear: The text has to be in sharp focus. No blurriness.
- Evenly Lit: Make sure there are no shadows or bright glare spots covering the text.
A flatbed scanner gives you the gold standard, but the document scanning mode on most modern smartphones works surprisingly well for this.
Is It Safe to Use Online OCR Tools?
This is a security question you really need to consider. When you upload a file to a free online conversion site, you're handing your document over to a third-party server. You have no real idea who has access to it, how they store it, or if they delete it.
For anything sensitive—contracts, financial records, client info—just don't risk it. Stick with an offline method, like the built-in Word PDF conversion. If you must use an online service, use one from a reputable company and always, always read their privacy policy first.
If you’re regularly processing dozens or hundreds of documents and need to pull out specific information, a simple text conversion won’t cut it. A tool like DocParseMagic is designed for that kind of scalable work. Instead of just grabbing text, our platform intelligently understands and extracts key data points from things like invoices, receipts, and reports, turning them into structured, spreadsheet-ready data. See how much time you can save at https://docparsemagic.com.